graphics and image formats
____________________________________________
Images which you will be using for this lesson:
_________________________________________________________________
The Marquee tools:
Example of a selection
Note: To access all the three selection tools click on the small arrow at the bottom right corner of the tool that is showing. 

_________________________________________________________________
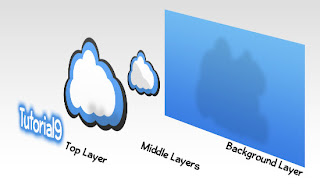
Layers:
If you do not find the layers pane on the right-hand side of your Photoshop screen, click on Window (top menu bar) and then Layers from the list.
To add a new layer click on the New Layer button as shown in the picture below:
_________________________________________________________________
The Losso tools:
The Losso tool lets you select irregularly shaped areas.
- The first tool from the three, simply, Lasso Tool, is the more difficult to use since you need a very steady hand to go round an image while holding down the left mouse button.
- The Magenetic Lasso Tool (third one) is a much easier tool to use as it tries to move along and follow the outline of the shape. You don't need to keep holding down the left mouse button for it to function. It also allows you to left-click so that you make sure that it goes to the exact place where you want it. It is not totally reliable but much more easier to use than the Lasso Tool.
- The Polygonal Lasso Tool only follows straight lines - therefore not suitable to go around images containing curves. It has its use though and it will come in handy later on.
_________________________________________________________________
The Clone Stamp Tool:
It is not as straightforward to use but not difficult neither. You need to first hold down the ALT button on your keyboard while you left-click on an area which you want to reproduce (having the right colour and texture). Then by simply holding down the left button, draw on the area you want to fix or remove.
You might wish to zoom in your picture before using the Clone Stamp Tool and adjust the brush width as well. This video explains all.
_________________________________________________________________
This tool comes in handy when we need to tidy up our work. Sometimes the end result is a bit too sharp so we would need to smudge edges for example so that they look more natural. Using this tool is very easy - simply select it from the tool bar on the left, and then drag your mouse over the area where you need to be smudged while holding down the left mouse button.
When clicking on the bottom corner arrow of the tool, you will get two more tools, the Blur tool and the Sharpen tool.
You might not see the Smudge tool at first in its place - this is because someone before you might have used the Blur or Sharpen tools and therefore these will be visible. If this is the case, only need to click on the bottom right arrow and choose the Smudge tool yourself.
_________________________________________________________________
The Eraser Tool is simply an eraser - you will cancel what you draw with it.
The Magic Eraser removes a selected colour from the image and gives you a transparent background instead. You might need to adjust the Tolerance (from the top menu) to get the desired result.
_________________________________________________________________
Common Shortcuts:
Ctrl+c To copy
Ctrl+v To paste
Ctrl+x To cut
Ctrl+z To undo
Ctrl-d To Deselect (after having used any marquee tool or lasso tools)
Alt+Backspace button To fill with foreground colour
Ctrl+Backspace button To fill with background colour
Ctrl+ + To zoom in
Ctrl+ - To zoom out
ACTIVITIES: Save the pictures in the section Images which you will be using for this lesson.
1. Now, for the first picture, the one with the two monkeys, you have to fix all blemishes so that the picture looks as perfect as possible. 2. Select the monkey which has crossed arms, and place it on the table image, making it look as if it is sitting at the table waiting for food.


No comments:
Post a Comment
Add you comment/question here.